Why UTM?
For virtualization on an Apple Silicon Mac, UTM is the most practical general-purpose VM solution available. VirtualBox has historically been the go-to for local VMs, but Apple Silicon support still has rough edges — and depending on your organisation’s policies, Oracle’s licensing terms may rule it out entirely. UTM sidesteps both problems. It wraps QEMU and — for ARM64 guests — can run in Virtualize mode, which uses the Mac’s hardware virtualization extensions directly. This gives you near-native performance for a Debian server VM without the overhead of software emulation.
This guide walks through creating a Debian 13 (Trixie) server VM from a netinstall ISO using UTM’s VM wizard.
What You’ll Need
- UTM — free from mac.getutm.app or the Mac App Store
- Debian 13 ARM64 netinstall ISO — download
debian-13.x.x-arm64-netinst.isofrom cdimage.debian.org
The netinstall image is small (~400 MB) and pulls packages from the internet during installation. Make sure you have a working network connection when you run the installer.
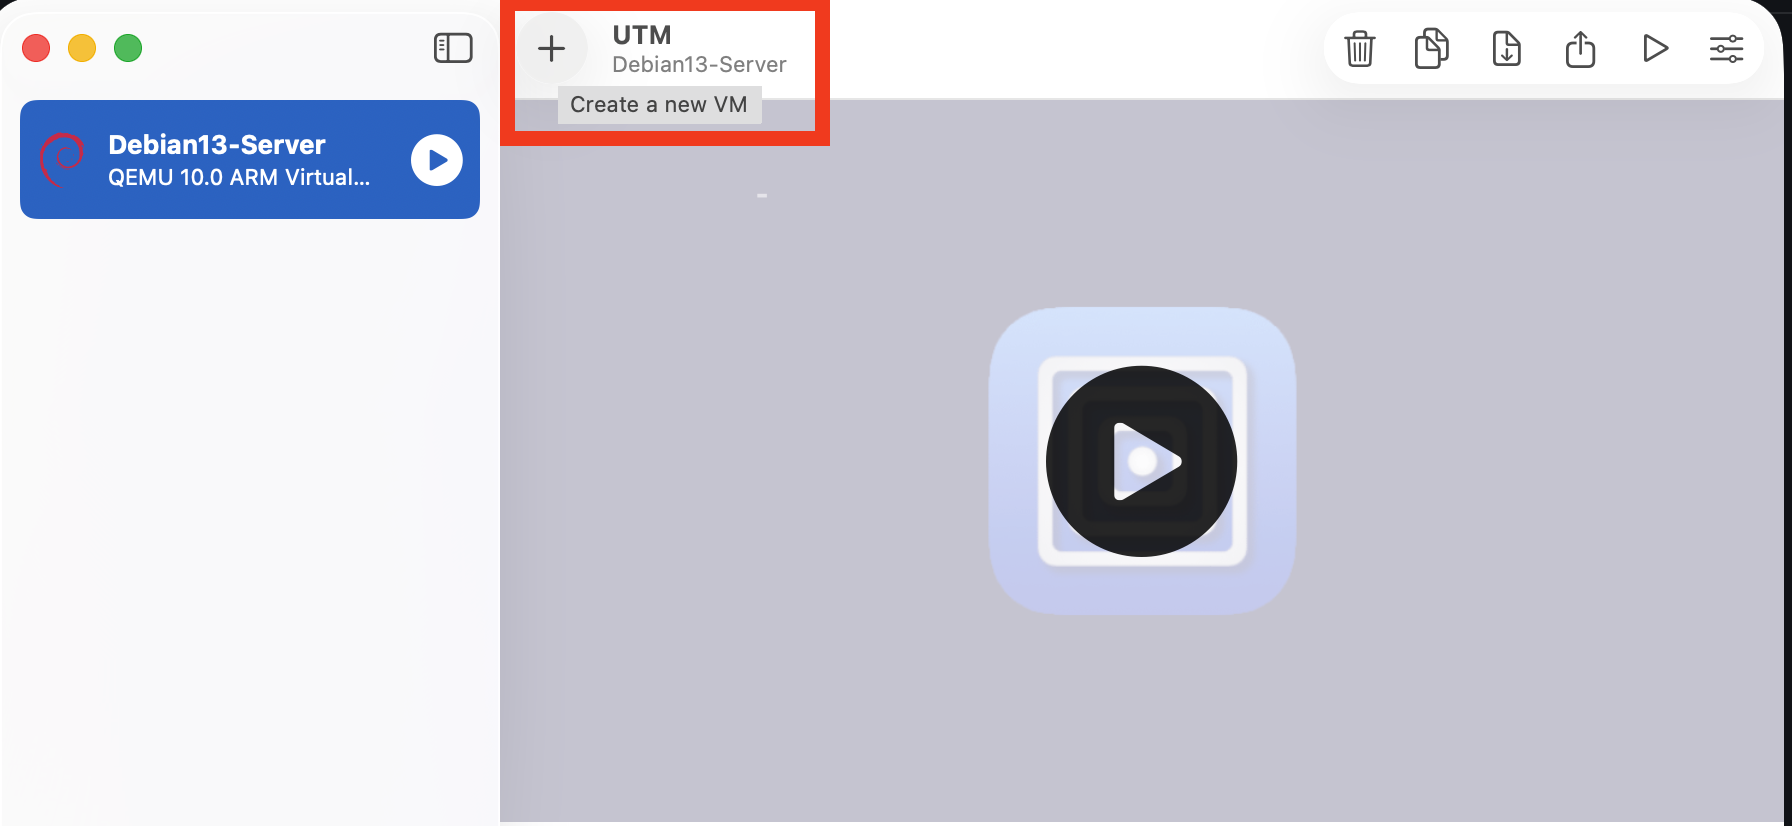
Step 1: Create a New VM
Open UTM. In the toolbar at the top, click the + button to start the new VM wizard.
Step 2: Choose Virtualize
On the Start screen you’ll see two options. Choose Virtualize.
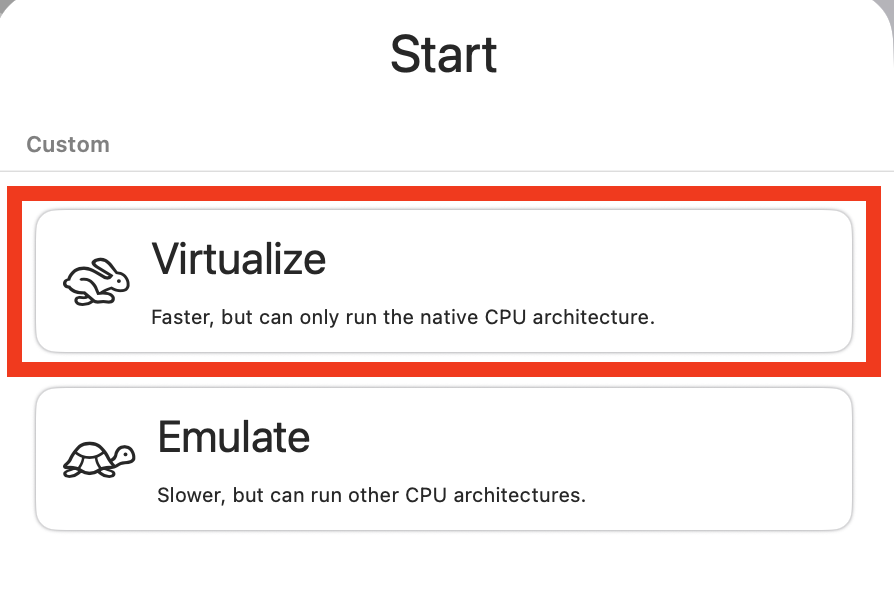
Virtualize uses the native Apple virtualization hypervisor via QEMU and can only run guests that match the host CPU architecture — ARM64 in this case. Since the Debian ARM64 ISO matches the M-series chip architecture, this is exactly what we want. The alternative, Emulate, is slower and intended for running x86 guests on Apple Silicon.
Step 3: Select Linux as the Operating System
On the Operating System screen, select Linux.

Step 4: Select the Debian ARM64 ISO
The Linux configuration screen handles the boot image. Leave the Virtualization Engine setting on QEMU (the recommended default — Apple Virtualization is experimental). Under Boot Image Type, select Boot from ISO image, then click Browse and select your downloaded debian-13.x.x-arm64-netinst.iso.
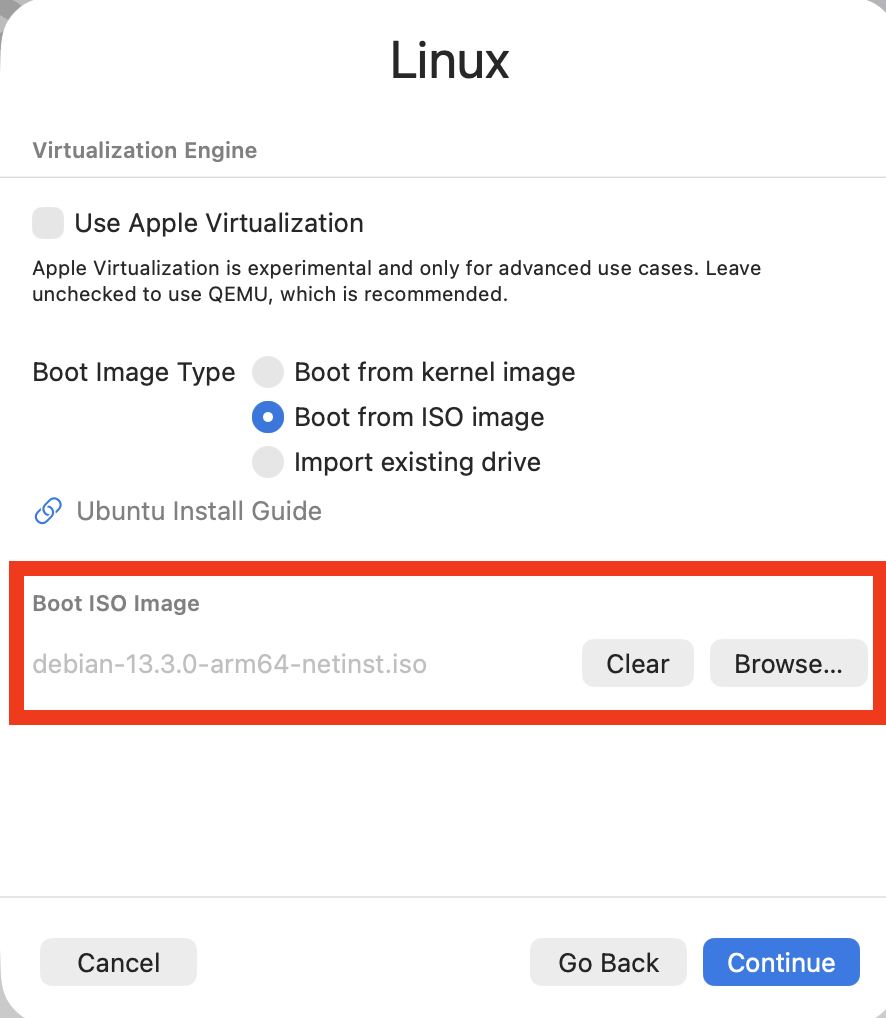
Note: If UTM shows the filename grayed out in the Boot ISO Image field (as shown above), that’s just the placeholder text — once you browse and select the ISO it will be populated. Click Continue when done.
Step 5: Configure Hardware
On the Hardware screen, set the amount of RAM and the number of CPU cores. The defaults are reasonable, but I bumped both up slightly for a server VM I plan to run continuously:
- Memory: 4096 MiB (4 GB)
- CPU Cores: 2
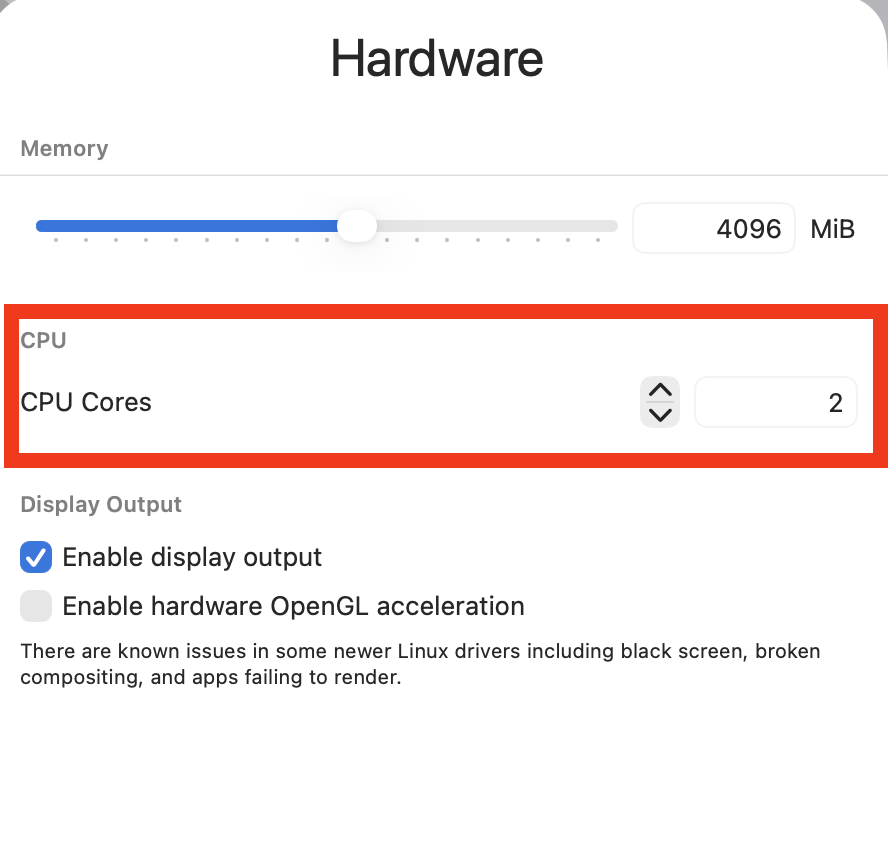
Adjust these to match your Mac’s available headroom. For a lightweight server (Forgejo, Prometheus, a DNS resolver) 2–4 GB and 2 cores is plenty.
Leave Enable display output checked — it makes the initial installation much easier. You can disable the display later if you only plan to SSH into the VM.
Step 6: Configure Storage
Set the virtual disk size on the Storage screen. 64 GiB is a good starting point for a general-purpose server VM.
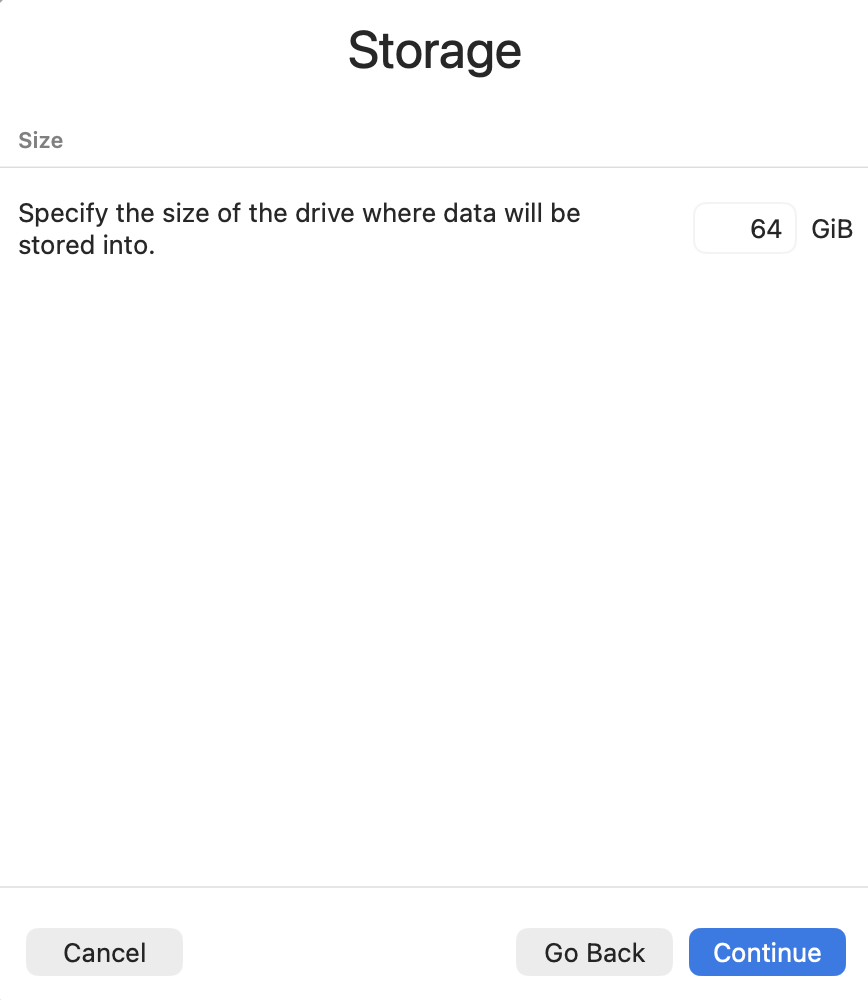
UTM allocates virtual disk space dynamically, so the file on your Mac won’t immediately consume 64 GB — it grows as you write data into the VM.
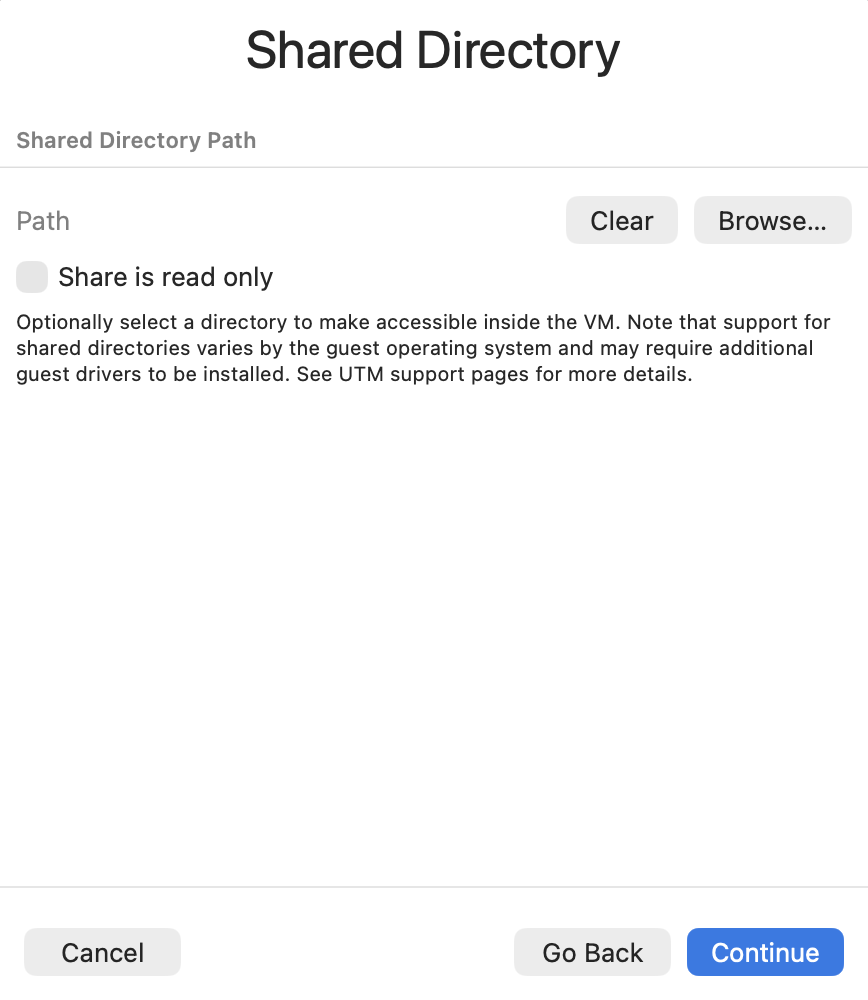
Step 7: Shared Directory (Optional)
The Shared Directory screen lets you mount a folder from your Mac inside the VM. This is handy for transferring files without SCP, but it requires the virtiofs driver inside the guest. For a fresh Debian install you can skip this and configure it later if needed. Leave it blank and click Continue.
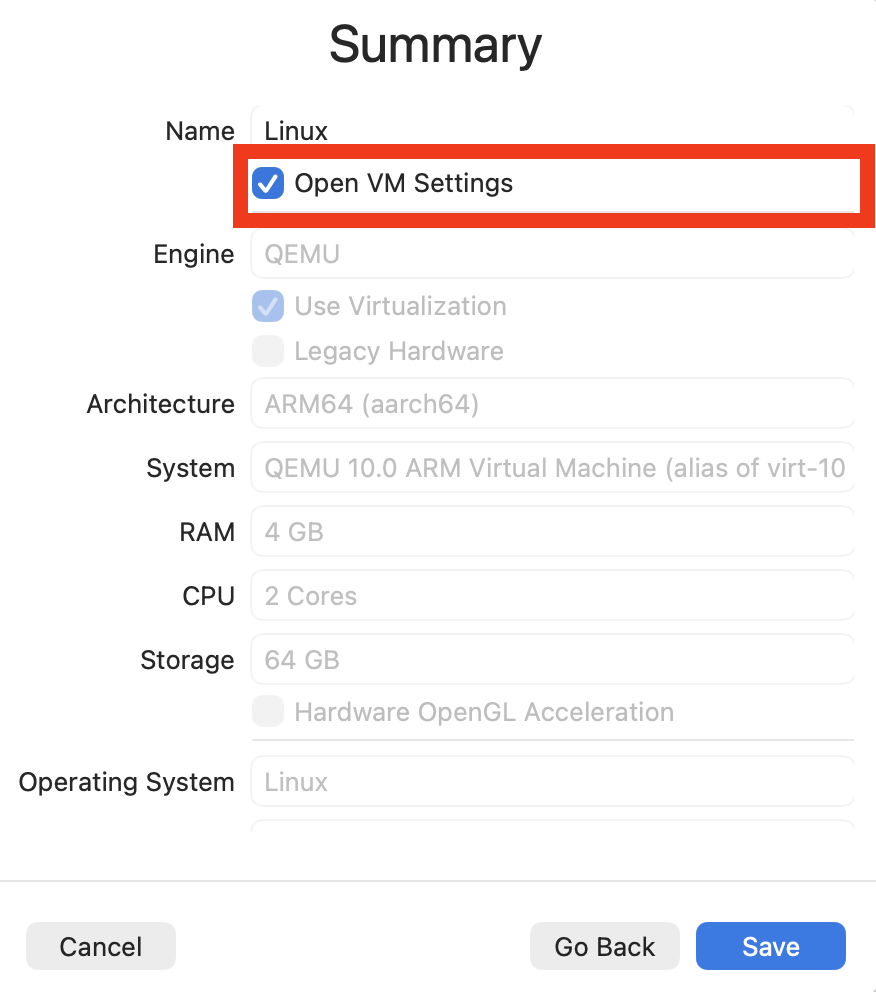
Step 8: Review the Summary and Save
The Summary screen shows the full configuration before saving. Check that everything looks right:
- Engine: QEMU, Use Virtualization enabled
- Architecture: ARM64 (aarch64)
- System: QEMU 10.0 ARM Virtual Machine
- RAM: 4 GB
- CPU: 2 Cores
- Storage: 64 GB
- Operating System: Linux
Check the Open VM Settings box before clicking Save — this opens the VM’s settings panel immediately so you can review the network configuration before first boot.
Step 9: Review the Network Settings
After saving, UTM opens the VM settings. Navigate to Network in the left sidebar. The default network mode is Shared Network, which is supposed to act like NAT and give the VM internet access through your Mac.
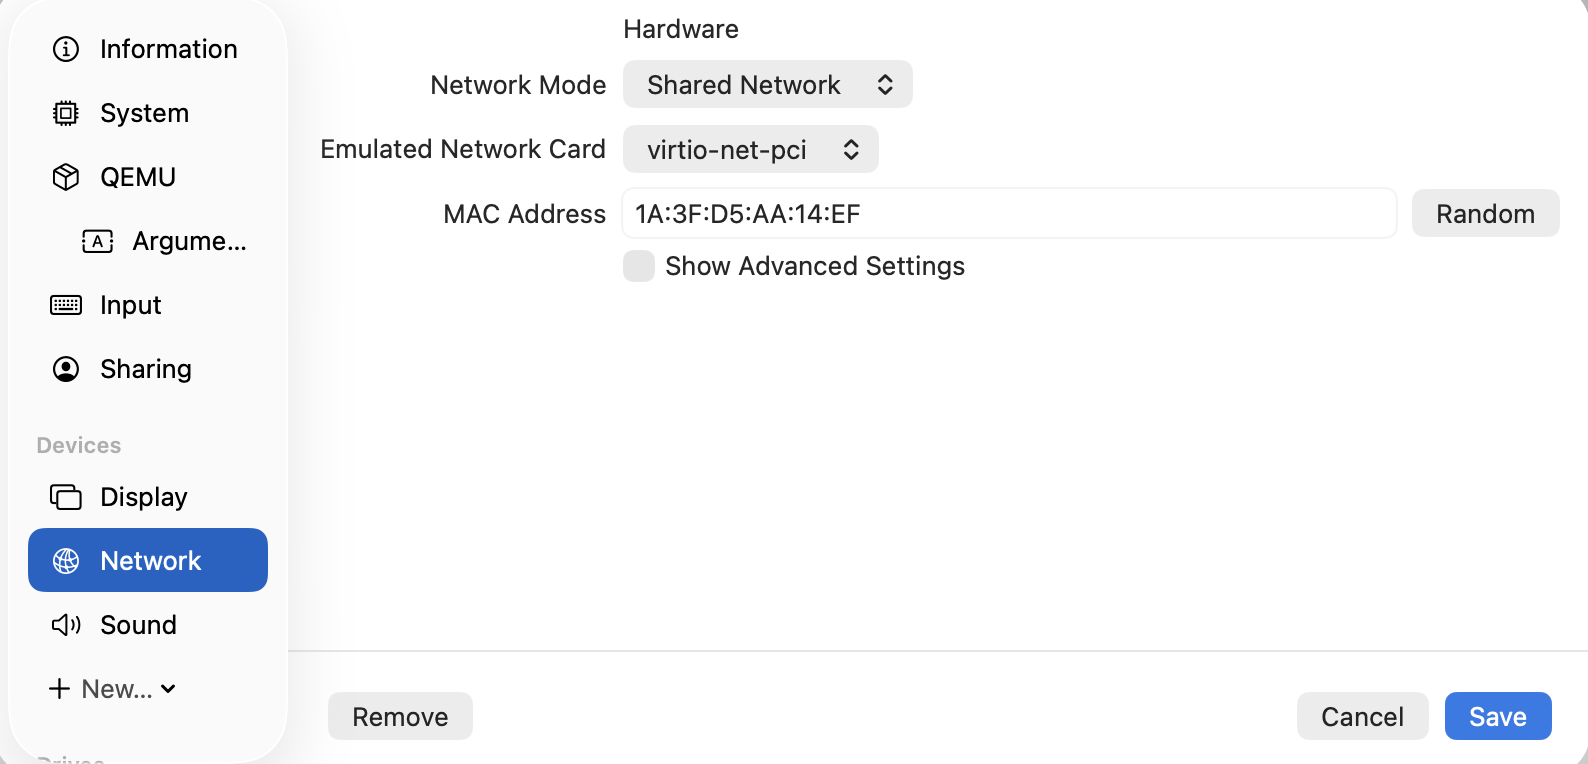
In practice, Shared Network did not work for outbound internet access during the Debian installation — the netinstall installer couldn’t reach a mirror to download packages. If you hit the same wall, the fix is to switch to Emulated VLAN before you boot.
Step 10: Switch to Emulated VLAN
Change the Network Mode to Emulated VLAN. This is the mode that actually provides reliable outbound internet access from the VM, and it’s what the Debian netinstall needs to pull packages from a mirror.
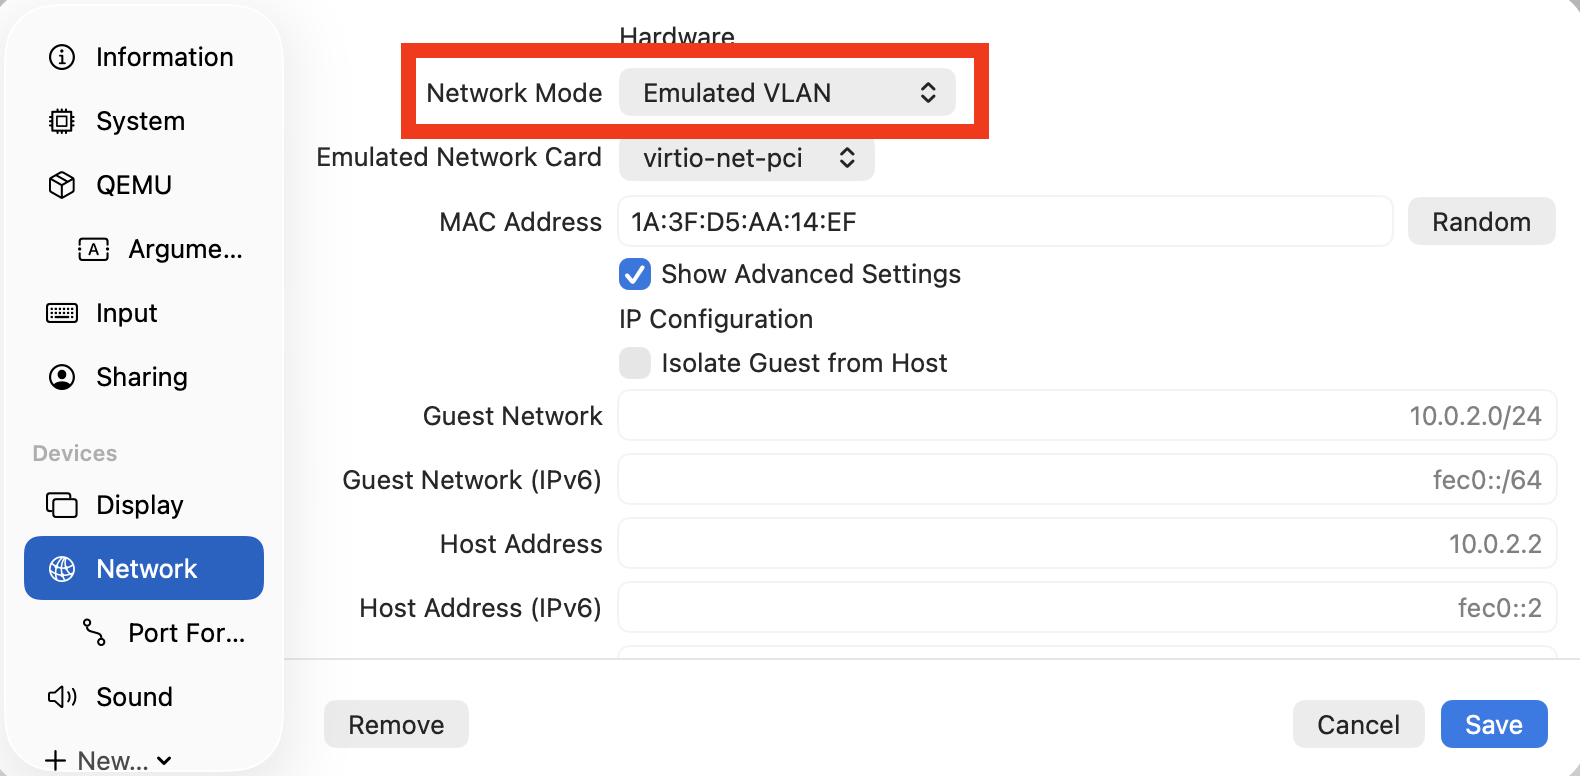
With Show Advanced Settings enabled you can see the full IP configuration: the guest network is 10.0.2.0/24 and the host is reachable at 10.0.2.2. The VM gets a DHCP address in that range automatically — no manual configuration needed inside the guest.
Setting Up SSH Port Forwarding
To SSH into the VM from your Mac, scroll the left sidebar down to Port Forwarding and add a new rule:
| Field | Value |
|---|---|
| Protocol | TCP |
| Guest Address | (leave blank) |
| Guest Port | 22 |
| Host Address | 127.0.0.1 |
| Host Port | 2222 |
This maps port 2222 on your Mac’s loopback address to port 22 inside the VM. Once the VM is running you can SSH in with:
ssh username@127.0.0.1 -p 2222
Click Save when done.
Forgot to install the SSH server? If you skipped it during the Debian installer’s software selection, log in at the UTM console and run:
sudo apt install openssh-server
sudo systemctl enable ssh
sudo systemctl start ssh
After that, SSH over port 2222 will work without rebooting.
Step 11: Boot and Install Debian
Start the VM by clicking the play button. UTM opens a virtual display window and boots from the Debian netinstall ISO. Within a few seconds you’ll see the GNU GRUB bootloader menu.
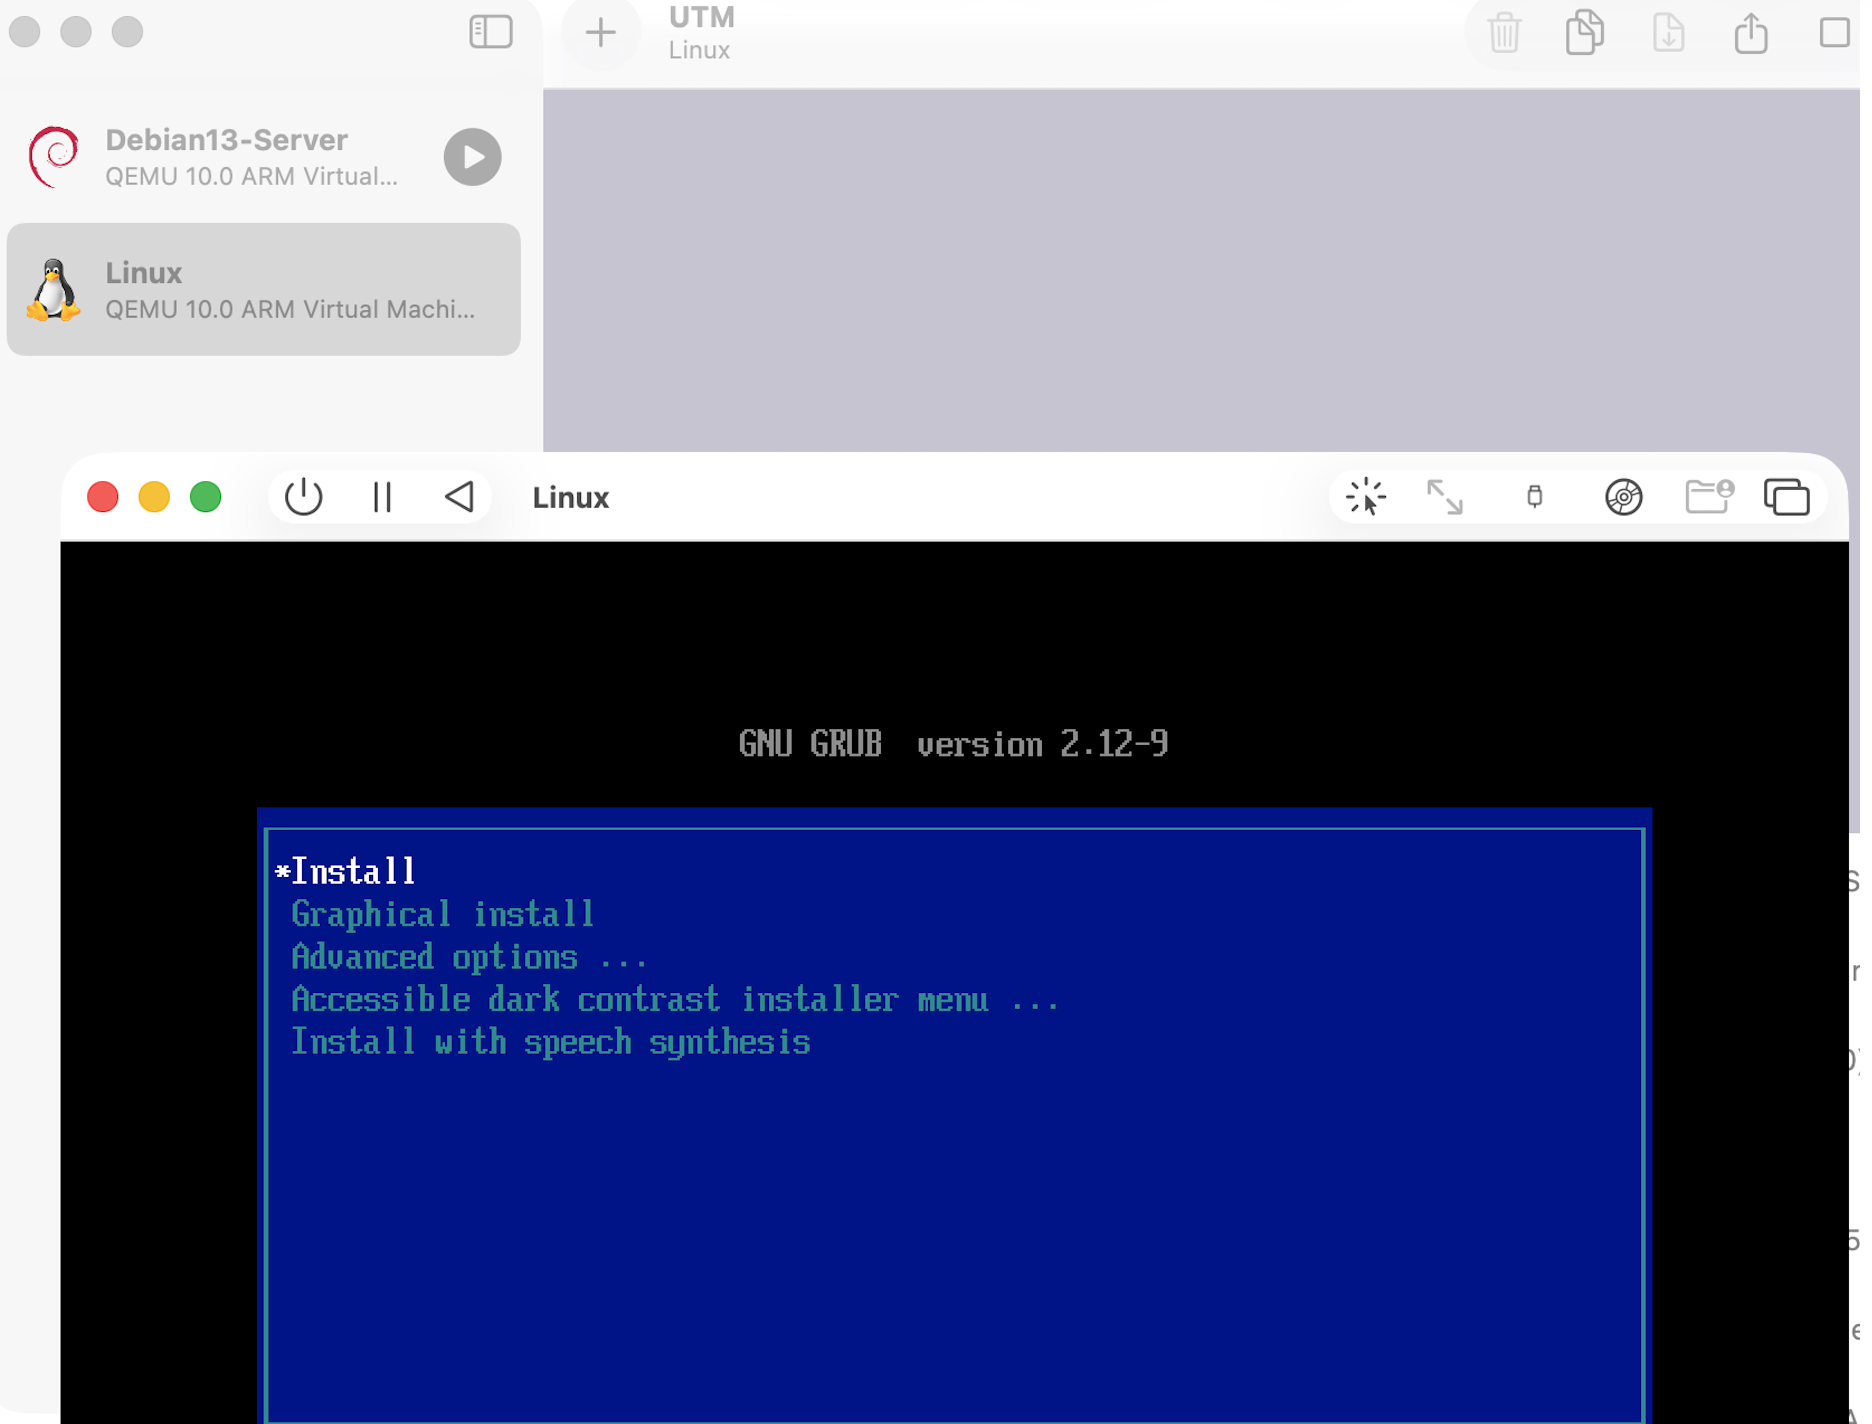
Select Install (the text-based installer) or Graphical install — both work fine. Proceed through the standard Debian installer:
- Select language, location, and keyboard layout
- Configure your hostname and domain
- Set the root password and create a user account
- Partition the disk — for a simple server VM, use Guided — use entire disk
- Select a mirror for package downloads
- Choose software to install — for a minimal server, deselect the desktop environment and keep only SSH server and standard system utilities
- Install GRUB to the virtual disk when prompted
The installer will reboot the VM when it finishes. UTM automatically detaches the ISO after a successful install, so the VM will boot from the virtual disk on the next start.
After Installation
Once Debian is running you can SSH in from your Mac:
ssh your-username@<vm-ip-address>
If you used Shared Network mode, find the VM’s IP by logging in at the UTM console and running ip a. If you used Emulated VLAN, the VM’s address will be in the 10.0.2.0/24 range and you’ll need to SSH via port forwarding.
From here the VM is a standard Debian 13 ARM64 server — install packages, configure services, and treat it like any other Debian node. If you plan to use it with Ansible or include it in your homelab’s certificate infrastructure, you can follow the same steps as any other internal Debian host.
Troubleshooting: Editing Port Forwarding Rules Directly
The UTM UI for managing port forwarding rules is buggy. Trying to edit or delete an existing rule often doesn’t work — changes don’t save, or the UI simply ignores your input. If you need to fix a misconfigured rule, the reliable path is to edit config.plist directly.
Make sure the VM is stopped before editing the file.
Finding the config.plist
UTM stores each VM as a .utm bundle (it looks like a single file in Finder, but it’s actually a package directory). To get inside it:
- Open Finder and navigate to the UTM documents folder:
~/Library/Containers/com.utmapp.UTM/Data/Documents/ - Right-click your
.utmfile (e.g.Debian13-Server.utm) and choose Show Package Contents - Open
config.plist
What to Edit
The port forwarding rules live under the Network → PortForward array. Each rule is a <dict> with three keys:
<key>PortForward</key>
<array>
    <dict>
        <key>GuestPort</key>
        <integer>22</integer>
        <key>HostPort</key>
        <integer>2222</integer>
        <key>Protocol</key>
        <string>TCP</string>
    </dict>
</array>
To add, change, or remove a rule, edit the integers or remove the <dict> block entirely. Save the file, then start the VM — UTM will pick up the updated configuration on next boot. You might also have to restart the UTM UI entirely to display your changes correctly.